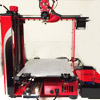
Mic 6 tooling plate
Re: Mic 6 tooling plate
Yeah we are talking only a slight amt here. It doesnt take much force to flex steel like that when we are only talking about moving it 100 microns or so over maybe a 10" span.
Re: Mic 6 tooling plate
I can fit a .015" business card corner under my 12" steel scale placed on the top rail. Which is consistent with the reading that I get with my indicator (showing a high spot in the middle with .015" drop at each far end in the X-axis).
My belts do not seem very tight at all. I don't know the proper way to set the tension, so I'm hesitant to relieve the tension the see if it effects the top rail.
My belts do not seem very tight at all. I don't know the proper way to set the tension, so I'm hesitant to relieve the tension the see if it effects the top rail.
Re: Mic 6 tooling plate
Also keep in mind that it very well may not be all in the x rail. Perhaps some if that is from the print bed and some from the rail. Who knows. All i can say is if i had a low spot in the middle if my build plate i could correct it with just belt tension.
Re: Mic 6 tooling plate
Each of those screw/bolt holes is a weak point and affects the performance of the layers. I doubt that the screws/bolts are all torqued to the same tightness which would affect this issue as well as the order in which the screws/bolts are tightened.It's a 3mm stainless steel frame, bolted to a 5mm aluminum plate, bolted to a 10mm hardened chromed steel rail with like 12-14 stainless steel fasteners in a big fat sandwich. If a belt wants to flex that I don't think I'm in a position to tell it no.
Also, different metals have different expansion/contraction characteristics when heat is applied or removed. A non-linearity of 100 microns is almost a miracle.
0.015" on the other hand ----- not so much

Re: Mic 6 tooling plate
Actually this is one thing I honestly believe (starry eyed dreaming, not like "i have a source on the inside") that MG does when assembling. I would be 100% not surprised to find they torque those bolts to spec, and in a certain order.lem wrote:Each of those screw/bolt holes is a weak point and affects the performance of the layers. I doubt that the screws/bolts are all torqued to the same tightness which would affect this issue as well as the order in which the screws/bolts are tightened.It's a 3mm stainless steel frame, bolted to a 5mm aluminum plate, bolted to a 10mm hardened chromed steel rail with like 12-14 stainless steel fasteners in a big fat sandwich. If a belt wants to flex that I don't think I'm in a position to tell it no.
Custom 3D printing for you or your business -- quote [at] pingring.org
Re: Mic 6 tooling plate
Lots of great information here, Thanks.
My question is, I am trying to print on an aluminum plate, but I do not want to remove the part afterwards. I plan you print prototype patterns on the plate, put it in a box, and make sand mold off of it. Would 6061-T6 work to print one part on? Also what is the best way to keep the "permanent" adhesion I want?
Also the glass bed on the stock M2 is .125" thick. Are you adjusting the Z-offset in the program or are you moving the Z set screw? I will be switching between the .125" glass and .250" aluminum, so if I could change the Z-offset in the computer, it would make swapping a lot easier. I have S3D, btw

Re: Mic 6 tooling plate
You can do it in software. The other questions I cannot comment on .

Re: Mic 6 tooling plate
We do both, but generally the Z-offset is used just for fine-tuning. Don't know if this will work or not - that's over 3.0 mm difference between the two plate thicknesses, but it's worth trying, I guess. Be sure to set your Z-stop perfectly for the thicker plate (aluminum) and then you can try moving the glass plate up closer to the nozzle for printing, by entering a negative number in the Z-Offset. (-3.175 mm if they are exact, but measure them with calipers to get the right number).Alloy wrote:...Also the glass bed on the stock M2 is .125" thick. Are you adjusting the Z-offset in the program or are you moving the Z set screw? I will be switching between the .125" glass and .250" aluminum, so if I could change the Z-offset in the computer, it would make swapping a lot easier. I have S3D, btw
Don't try to do it the other way - you'll smack the nozzle with the aluminum plate when you home Z, and probably bust something. It's still chancy, because if you forget that you are printing on aluminum vs. glass and leave that Z-offset value in there, you're still going to smack the nozzle, so if you can come up with a better idea, i'd go with it.
(Like maybe, instead of leaving the shape attached to the plate, design it so that it sits on a thin solid base or raft. Then you take the whole thing off, raft and all, and make your sand mold off of that. Then you don't need the aluminum plate, you can print it on the glass. Or the aluminum plate, if you prefer, but you won't have to switch back and forth. It would be a lot safer.)
Re: Mic 6 tooling plate
Sufficient glue stick over enough surface area will give you a pretty sturdy bond unless you go to pry it off.
As Jules said, if you set the end stop for the thinner plate, you will ram the nozzle on the thinner plate. But if you set it for the thicker plate, well, the switch only has so much extra travel before hitting its own body.
As Jules said, if you set the end stop for the thinner plate, you will ram the nozzle on the thinner plate. But if you set it for the thicker plate, well, the switch only has so much extra travel before hitting its own body.
Re: Mic 6 tooling plate
Alloy wrote:Lots of great information here, Thanks.
My question is, I am trying to print on an aluminum plate, but I do not want to remove the part afterwards. I plan you print prototype patterns on the plate, put it in a box, and make sand mold off of it. Would 6061-T6 work to print one part on? Also what is the best way to keep the "permanent" adhesion I want?
Also the glass bed on the stock M2 is .125" thick. Are you adjusting the Z-offset in the program or are you moving the Z set screw? I will be switching between the .125" glass and .250" aluminum, so if I could change the Z-offset in the computer, it would make swapping a lot easier. I have S3D, btw
Use 6061 with painters tape, and print cold with a good smush. Painters tape is more or less permanent if you smush the part down.
Also, set your Z alignment for the shorter piece (the glass), and for the aluminum change your start gcode to something like:
Code: Select all
M82   ; extruder is absolute
G90   ; XYZ is absolute
G21   ; all units are in millimeters
M84   ; disable motors, let bed fall
G28 X0 Y0   ; only home X & Y, leave Z down
G1 X210 Y50 F3200   ; move X off the bed and move Y forward enough to get past the binder clips
G28 Z0    ; now home just Z

;; only include the following code if you have the thicker plate installed ;;
; this Z value will have to be determined empirically
; higher numbers will move the nozzle farther from the bed surface
; start high (5mm) and lower it to find the right height, not the other way around

G1 Z3.125   ; changeme as necessary
G92 Z0   ; tell the firmware the current position is now 0, "erasing" the height difference

;; end specific height offset ;;

G92 E0    ; reset extruder position
G1 Z0.4   ; move Z slightly above the bed
G1 E25 F200   ; purge
G1 X180 E26   ; wipe
G1 E25 F12000  ; retract
G1 X100 Y125 Z3 F4800 ; center nozzle, lift Z
Custom 3D printing for you or your business -- quote [at] pingring.org