warping of the first layer with pla
warping of the first layer with pla
Hi , lately im experienced warping in the first layer with PLA . It looks like its loosing adhesion , what might cause this to happen.
Re: warping of the first layer with pla
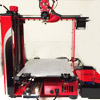
This is the area, also im having the same problems with most all my prints , the bottom area becomes " curved"
- Attachments
-
- 20140909_195328.jpg
- (295.84 KiB) Downloaded 1671 times
Re: warping of the first layer with pla
what is the bed your printing on? are you using hairspray, glue stick or .........
Re: warping of the first layer with pla
Right now im using glue stick, elmers purple
Re: warping of the first layer with pla
What temp do you have the bed set at?
Re: warping of the first layer with pla
Im setting the temp at 70, im using Simplify
Re: warping of the first layer with pla
well pla does warp. its definitely not that bad but it can warp a little. its hard to tell from you picture how big that part it but looks like a tall square box which is the toughest thing. you'll just need to bond it down with something a little better. maybe add a brim or mouse ears to the model.
Re: warping of the first layer with pla
jimc is right on about the brim or mouse ears. Sharp corners on PLA tend to curl up, especially if the model is fairly large with respect to surface area on the bed, because of the shrinkage on cooling, but also because the extremities of the bed are a bit cooler than the center.
I would try about 5 perimeters of brim. The trick here is to get it connected JUST ENOUGH to the part to hold it down without making it so well-connected that it's a permanent part of your print and difficult to remove -- so you'll need to play with the spacing from the part. If your nozzle is 0.35 mm, then your extruded filament is about 0.4 mm (-ish) wide. You don't want a full 0.4 mm gap from the part, because the brim won't be touching the part and won't help hold it down. If you make the brim separation zero, you'll need to be good with a sharp knife to remove it (but it will be great at holding the part down!). Somewhere in the range of 0.05 to 0.1 mm separation works for me. Then it is bonded to the part just barely, enough to hold it on the bed, but you can usually tug the brim off the part like pulling a zipper. (It's like the indentation in the pop-top on an aluminum beverage can -- the can is sealed, but that little semi-cut line controls where the metal splits when you open the can. Almost always )
)
Hope this helps!
Dale
I would try about 5 perimeters of brim. The trick here is to get it connected JUST ENOUGH to the part to hold it down without making it so well-connected that it's a permanent part of your print and difficult to remove -- so you'll need to play with the spacing from the part. If your nozzle is 0.35 mm, then your extruded filament is about 0.4 mm (-ish) wide. You don't want a full 0.4 mm gap from the part, because the brim won't be touching the part and won't help hold it down. If you make the brim separation zero, you'll need to be good with a sharp knife to remove it (but it will be great at holding the part down!). Somewhere in the range of 0.05 to 0.1 mm separation works for me. Then it is bonded to the part just barely, enough to hold it on the bed, but you can usually tug the brim off the part like pulling a zipper. (It's like the indentation in the pop-top on an aluminum beverage can -- the can is sealed, but that little semi-cut line controls where the metal splits when you open the can. Almost always
Hope this helps!
Dale
Re: warping of the first layer with pla
Thanks , i will try the brim in the 3d model , yeah the model is a rectangular lamp shade aprox 3.5"x 3.5"x 7".

Re: warping of the first layer with pla
I run my glass under hot water to remove the old Elmer's and wipe with a sponge.
Then I use a small alcohol wipe on it after it dries.
I'm currently using two coats of the purple Elmer's, one vertical and one horizontal. had been using three but it was overkill.
Bed heat at 60 degrees.
I had been getting lots of pulling up prior to this. But there is also one large contributing factor that I think had a lot to do with it.
My printer is now outside. Prior to that it was in my office. The air conditioner continually turned on and off, hit the wall behind the printer and the cool air would hit the print from the back side. I suspect this was also playing a big part in the pulling up. Anyway, after moving it outside with the Florida heat and humidity and performing the above ritual things are good. I do it for every print, I don't re-use the bed. I still have lots of things to improve but pulling up at the corners is not one of them anymore for me. EDIT: Fingers crossed