I used to think it was a bad thing until this recent project I'm working on. I'm making parts that involve a domed screen nested inside of an outer solid dome. The domes are large, so printing them with support is just not worth the extra cost and time. So I just print them without support and then go clean up the mess on the dome ceilings with a ball sander afterwards. However, quite a mountain range of globs build up when closing the top of the screen domes. This is because the slots in the walls prevent the walls from being made using concentric circles, so it gets very messy as the thin fingers curl up on the ends and scrape filament onto the print head which builds up and then gets dropped off elsewhere. It's very unsightly to watch, but amazingly the printer gets through it despite having to drag over such a rough surface. As bad as that picture looks below, it manages to self heal itself and you would never know it was there.
Now, if this were one of those printers with the rigid, fixed platforms where the print head moves on the Z axis instead this would never work. Those blobs are rock solid and not going anywhere, so something else would have to give. The model would get knocked off, motor steps would be lost, the print head might get knocked out of alignment... something would have to give. But on the M2, the platform flexes instead and deflects this load in a non-destructive way. Without that flex, these vacu-form screens I'm selling would not be a viable product due to the increased time and cost of printing with loads of support material.
So M2 designers, if anyone ever complains about the platform flexing PLEASE DON'T CHANGE IT! That flex makes it very blob tolerant, and sometimes there is just going to be blobs.
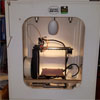
- blobs.jpg (174.91 KiB) Viewed 11396 times

