Part Pulled Chip Out of Glass
-
pyronaught
- Posts: 684
- Joined: Mon Dec 01, 2014 8:24 pm
Re: Part Pulled Chip Out of Glass
The only issue I'm having currently with the 5 mil kapton sheets is that there seems to be bubbles forming under the area I've been printing on. They were not there when I first applied the sheet, but then slowly formed over several prints. I'm hoping the air passes through the film over time and the bubbles go away the way they do with the 2mil sheets. How they get there is a mystery though.
Experience is what you get when you didn't get what you wanted.
Re: Part Pulled Chip Out of Glass
The parts are probably warping and pulling the tape off the bed.

Re: Part Pulled Chip Out of Glass
You can encourage that by poking the point of a needle into the middle of the bubble, just enough to pass all the way through. Then press the bubble flat, working from the edges inward, and it'll be all good forever more.pyronaught wrote:hoping the air passes through the film over time
Worked that way when I was using Kapton on aluminum plates with the Thing-O-Matic, anyhow.
Re: Part Pulled Chip Out of Glass
I had a few that materialized as well but after a few cycles on the head bed they all went away.pyronaught wrote:The only issue I'm having currently with the 5 mil kapton sheets is that there seems to be bubbles forming under the area I've been printing on. They were not there when I first applied the sheet, but then slowly formed over several prints. I'm hoping the air passes through the film over time and the bubbles go away the way they do with the 2mil sheets. How they get there is a mystery though.
-
pyronaught
- Posts: 684
- Joined: Mon Dec 01, 2014 8:24 pm
Re: Part Pulled Chip Out of Glass
jimc wrote:The parts are probably warping and pulling the tape off the bed.
That's probably it, I'm printing cylindrical parts with lots of contact area and the bubbles are showing up around the perimeter where the warping forces are the strongest.
Experience is what you get when you didn't get what you wanted.
-
pyronaught
- Posts: 684
- Joined: Mon Dec 01, 2014 8:24 pm
Re: Part Pulled Chip Out of Glass
ednisley wrote:You can encourage that by poking the point of a needle into the middle of the bubble, just enough to pass all the way through. Then press the bubble flat, working from the edges inward, and it'll be all good forever more.pyronaught wrote:hoping the air passes through the film over time
Worked that way when I was using Kapton on aluminum plates with the Thing-O-Matic, anyhow.
I had actually done this before you suggested it, but it turns out not to be a good idea. What happens is that even after the bubble subsides after the platform cools, the hole allows the air back in so that the bubble reforms when the platform heats back up again. I poked holes in three bubbles and left all the others untouched. The bubbles without holes disappeared on their own and never came back, but the three with holes come back every time the platform heats up again. The best practice appears to be to just have patience and allow the bubbles to disappear on their own. The air works its way through the film very slowly, but in a couple of days all air is gone and as long as you don't give it a doorway to get back in by poking holes, it stays gone.
Experience is what you get when you didn't get what you wanted.
Re: Part Pulled Chip Out of Glass
Well, add me to the "lucky fan club" -- wasn't even that big a part. Glass was cool, I was sliding a wide razor under the edge of the part, and off it came with 3 pieces of glass. 
I may have to break down and get aluminum, though I don't have tools here to cut it down to size...
I may have to break down and get aluminum, though I don't have tools here to cut it down to size...
-Vprints
Changing my world, one print at a time
Changing my world, one print at a time
-
pyronaught
- Posts: 684
- Joined: Mon Dec 01, 2014 8:24 pm
Re: Part Pulled Chip Out of Glass
The 5 mil kapton sheets with ABS slurry has been working great for me.
Experience is what you get when you didn't get what you wanted.

Re: Part Pulled Chip Out of Glass
Sux!Vprints wrote:Well, add me to the "lucky fan club" -- wasn't even that big a part. Glass was cool, I was sliding a wide razor under the edge of the part, and off it came with 3 pieces of glass.
I may have to break down and get aluminum, though I don't have tools here to cut it down to size...
I second pyro's suggestion...I've been really pleased with the 3DXTech 4mil full sheet Kapton tape. (5 sheets for $18.)
http://www.amazon.com/gp/product/B00QEO ... UTF8&psc=1
You don't want to use a razor on it, but I use a light spray or swipe of hairspray/slurry/glue for perfect hold, and then pry it off easily with a rounded-edged Cricut spatula. (It has a thinner edge than all the other art spatulas and putty knives that I tried, but it won't damage the film.)
http://www.amazon.com/Cricut-Tools-Craf ... PDKIKX0DER
Usually I don't even wait for the item to cool, I can slide the spatula underneath a corner and slide it under the print to lift it off. (It's even quicker when it cools a bit - pops right off.)
It's thick enough that I don't worry about the glass being affected at all. (Might be something to try as an alternative to the aluminum bed.)
Note: Don't poke holes in it to pop tiny bubbles, they work themselves out in time. But the holes introduce a weakness where the tape can tear down the road, especially if you are running large prints. (Made some mistakes on my first sheet.)
-
pyronaught
- Posts: 684
- Joined: Mon Dec 01, 2014 8:24 pm
Re: Part Pulled Chip Out of Glass
Yeah, you don't want to get impatient with the air bubbles and poke holes to drain them-- I made that mistake too.
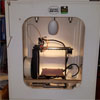
I finally did manage to put a small ding in my 5 mil kapton today. I was trying to get a worst-case part off the bed by prying it with the 2.5mm hex driver that comes with the M2, which I thought would be safe since it has a rounded tip. The two piece electronics enclosure for my flying saucer project seen below has a 135mm diameter bottom half with a 100% contact area, which makes it a real pain to get off the bed. Luckily it has some tiny notches around the bottom where wires pass through, giving it a hook point for prying it of the bed. You just have to use the right tool to keep from damaging the kapton, and the hex driver turns out to not be the right tool. Once you get an edge pried up it comes off pretty easy, but it's getting that first edge started that is the trick on such a large diameter, round footprint like that. I've never had problems with any other parts, only this one.
I finally did manage to put a small ding in my 5 mil kapton today. I was trying to get a worst-case part off the bed by prying it with the 2.5mm hex driver that comes with the M2, which I thought would be safe since it has a rounded tip. The two piece electronics enclosure for my flying saucer project seen below has a 135mm diameter bottom half with a 100% contact area, which makes it a real pain to get off the bed. Luckily it has some tiny notches around the bottom where wires pass through, giving it a hook point for prying it of the bed. You just have to use the right tool to keep from damaging the kapton, and the hex driver turns out to not be the right tool. Once you get an edge pried up it comes off pretty easy, but it's getting that first edge started that is the trick on such a large diameter, round footprint like that. I've never had problems with any other parts, only this one.
- enclosure.jpg (381.67 KiB) Viewed 12646 times
Experience is what you get when you didn't get what you wanted.