Mic 6 tooling plate

Re: Mic 6 tooling plate
I honestly was thinking about adding the heater to my plate and bolting it down firmly to the spider. Send me a heater and I can test it for you !!!  lol I know I will miss being able to remove it at times. I also wondered if I could get away with eight inch plate with heater directly on it to lessen the mass. That plate is heavy when to want to really make the m2 sing !!!
Re: Mic 6 tooling plate
i really think it needs to be removable. what happens when your prints are stuck to it? your trying to scrape or chisel prints off while the plate is on the printer. ive had stuff stuck to my plate where if i didnt remove the plate i would have been beating on the printer. i would easily throw it all out of adjustment. i find the stock heater now to work just fine and drop the plate on top in place of the glass. its easy. another thing is if you use hairspray or glue stick to stick the parts down, how do you wash that off if its part of the heater? i do this every week or two when there is too much buildup.

Re: Mic 6 tooling plate
One of my Thing-O-Matic hacks put two aluminum sheets atop the PCB heater. The top sheet was removable (I made three of them) and the bottom sheet captured the platform screws / springs to maintain the alignment. The initial writeup turned out to be somewhat optimistic, but it worked out surprisingly well:rpollack wrote:Removable is convenient but adds complexity.
http://softsolder.com/2011/04/13/thing- ... ild-plate/

I ended up clamping the stack together with a pair of bulldog clips. There was an insulating air gap between the aluminum sheets, but the combination of stable alignment and easy removal made up for it.
If you bond the heater to the removable plate, then you must do a good job of strain relieving the cable beyond the connector and ensuring it can't apply torque to the platform during Y axis motion. Auto-leveling can't compensate for that motion.
For what it's worth, a later hack put a microswitch on the TOM's platform to directly sense the top surface position. It didn't do auto-leveling, but it made the Z=0 position much more stable than sensing the maximum Z position of that laser-cut plywood and acrylic ziggurat. I'm a big fan of directly measuring the thing you want to measure. [grin]
I vote for removable, but only if it's stable...
Re: Mic 6 tooling plate
I'll takes pic of my mine also when I get back from the road this weekend ... it is on a mb replicator 1
for the m2 you can have it heated directly and it be removable ... though it means leaving the deans connectors exposed...those plugs are designed to be replugged a lot and is why they are used for rc batteries
for the m2 you can have it heated directly and it be removable ... though it means leaving the deans connectors exposed...those plugs are designed to be replugged a lot and is why they are used for rc batteries
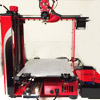
M2 - MKS SBase w Smoothieware, GLCD, 24v, Upg Z & extruder stepper - IR bed leveling, Astrosyn dampers X/Y/Z, MIC 6, Zebra, PEI, & glass Build Plates - E3D, V3B Hotends, & more - many other 3d printers - production printing.
Re: Mic 6 tooling plate
Ah, so that's why you have a shop... [grin]innkeeper wrote:it is on a mb replicator 1
Re: Mic 6 tooling plate
Oh, all right...jimc wrote:love your brass rod
- M2 Motor Mount - Cable Cap - installed
- cimg7826 - M2 Motor Mount - Cable Cap - installed.jpg (88.02 KiB) Viewed 12947 times
Turned out that 3 perimeter threads (my default) was too much for the aggressive overhangs, but 1 perimeter and no support worked fine. Negligible stringing, zero cleanup, perfect fit for those pretty cable ties.
Now, what was I doing? [sigh]
Re: Mic 6 tooling plate
haha see, isnt that much better lol

Re: Mic 6 tooling plate
1/4" MIC6 tooling plate with a slightly-smaller-than-used-now silicone heater applied to it, and pre-tapped M3 holes in the underside that line up with loose holes in the spider. The silicone heater and thermistor terminate to a single latching Molex plug, like used on GPUs (actually the 6-pin configuration used for GPUs is perfect, 2x 12v, 2x gnd, 2x thermistor, and I think each pin is rated 10A). Each M2 comes with a 20-pack of 8x10" pre-cut adhesive Kapton sheets. No warranty replacements if some dumbass named Bryan puts his aluminum sheet through the dishwasher to get the gluestick off of it.rpollack wrote:We are testing with a 1/4" cast aluminum build plate (rather than glass) to work with auto-level. The question we've been discussing is whether or not to have it be removable or not (heater attached directly) . Removable is convenient but adds complexity.
Feedback welcome...
Rick
Custom 3D printing for you or your business -- quote [at] pingring.org
-
Matt_Sharkey

- Posts: 347
- Joined: Mon Oct 20, 2014 3:10 pm
Re: Mic 6 tooling plate
I'd buy that! Im all about thermal performance, and having the heater element directly mounted to the plate would be best IMO, Especially since the 1/4 aluminium is much more resilient than the Boro (which i pulled a chip out of not 6 hours ago)insta wrote:1/4" MIC6 tooling plate with a slightly-smaller-than-used-now silicone heater applied to it, and pre-tapped M3 holes in the underside that line up with loose holes in the spider. The silicone heater and thermistor terminate to a single latching Molex plug, like used on GPUs (actually the 6-pin configuration used for GPUs is perfect, 2x 12v, 2x gnd, 2x thermistor, and I think each pin is rated 10A). Each M2 comes with a 20-pack of 8x10" pre-cut adhesive Kapton sheets. No warranty replacements if some dumbass named Bryan puts his aluminum sheet through the dishwasher to get the gluestick off of it.
Since now I'm in the market for a new HBP, maybe I'll ask a friend (machinist) to help me make exactly what Insta is proposing...